TL;DR:
- Homeowners in West Valley face permit delays, unexpected costs, and contractor issues that hinder remodel success.
- A clear project scope, realistic budget with contingencies, and early permit planning are essential for smooth execution.
Most West Valley homeowners begin their remodeling project with excitement and a rough number in their head, only to face permit delays, surprise costs from caliche soil, and a contractor relationship that drifts off-track halfway through. This remodeling project guide exists specifically to prevent that outcome. From defining your project scope and building a realistic budget to navigating Phoenix-area permits and managing contractors on-site, every section below is built around the realities of remodeling in Buckeye, Goodyear, and the greater Phoenix region. Follow it closely, and you will finish with less stress, fewer surprises, and a result you can be proud of.
Table of Contents
- Understanding your remodeling project essentials
- Budgeting your remodel with contingencies and real cost expectations
- Navigating West Valley permitting and inspection processes
- Managing contractors and workflow for a successful remodel
- Ensuring quality and handling remodeling challenges
- A West Valley remodeler's perspective: practical truths and lessons learned
- Work with Urban Edge LLC for expert West Valley remodeling
- Frequently asked questions
Key Takeaways
| Point | Details |
|---|---|
| Define project scope | Separating must-haves from nice-to-haves early helps prevent scope creep and budget overruns. |
| Plan budget wisely | Include a 10-20% contingency in your budget to cover material cost increases and unexpected expenses. |
| Start permits early | Begin the permitting process 6-8 weeks before demolition to avoid costly delays in your remodel timeline. |
| Hire licensed contractors | Use properly licensed residential contractors to ensure quality and code compliance in your remodel. |
| Inspect thoroughly | Pass key inspections like electrical and plumbing rough-in by preparing and rechecking work before inspector visits. |
Understanding your remodeling project essentials
Before a single wall comes down, your project needs a clearly defined scope. Scope creep, where the project quietly grows beyond what was originally planned, is one of the most common and expensive problems homeowners face. NARI remodeling professionals advise separating must-haves from nice-to-haves early, noting that scope creep affects 80% of projects and can add 15 to 20% to the final budget.
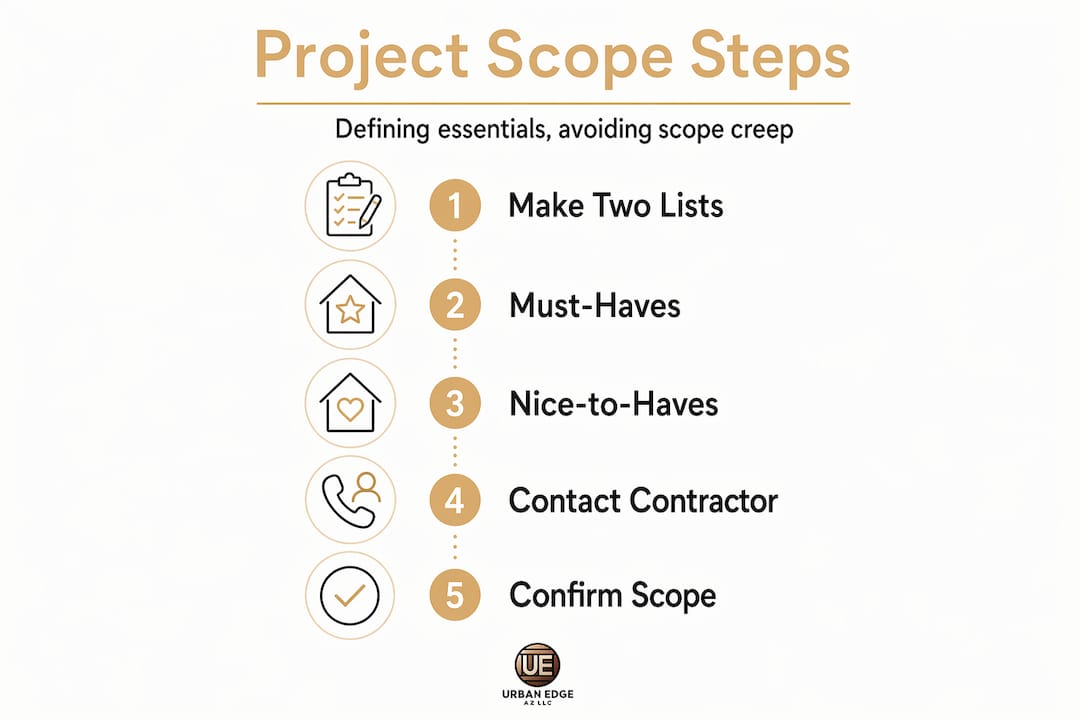
The best way to prevent this is to create two lists before you contact a single contractor. Your must-haves are the features your project cannot succeed without. Your nice-to-haves are things you would add if the budget allows. When cost pressures rise mid-project (and they often do), that second list is what you cut from first.
Common remodel types in West Valley homes
West Valley homes, especially those built during the housing boom years of the early 2000s, tend to share similar floor plans and building conditions. The most frequently requested projects include:
- Kitchen remodels: Cabinet replacements, countertop upgrades, lighting overhauls, and appliance relocations
- Bathroom upgrades: Walk-in shower conversions, vanity replacements, tile work, and fixture updates
- Room additions: Adding square footage, converting a garage, or enclosing a patio
- Interior updates: Flooring replacements, accent walls, and window or door upgrades
Each of these varies significantly in complexity, timeline, and permit requirements. A bathroom vanity swap is a weekend job. A kitchen gut-and-rebuild with moved plumbing is a 6-to-10-week project requiring multiple inspections. Knowing which category you are in changes everything about how you plan.
Project scope comparison
| Project type | Typical timeframe | Permit required | Estimated cost range |
|---|---|---|---|
| Minor bathroom refresh | 1 to 2 weeks | Usually no | $3,000 to $8,000 |
| Full kitchen remodel | 6 to 10 weeks | Yes | $18,000 to $50,000+ |
| Bathroom addition | 8 to 12 weeks | Yes | $25,000 to $60,000 |
| Room addition under 500 sq ft | 10 to 16 weeks | Yes | $40,000 to $100,000+ |
Exploring remodeling project ideas specific to Arizona homes can also help you identify which upgrades offer the best return for your property type and neighborhood.
Pro Tip: Walk through your home with a notepad before calling a contractor. Write down every issue you want resolved, then sort them into "must fix" and "would love to fix" columns. That exercise alone can cut your initial contractor conversations from two hours to 30 minutes.
Having set your project goals, next you will learn how to budget and prepare financially to keep costs manageable.
Budgeting your remodel with contingencies and real cost expectations
Homeowners consistently underestimate what remodeling actually costs. Not because they are careless, but because material prices shift fast and hidden conditions inside walls are impossible to price until you open them up. Good budgeting is not about finding the lowest number. It is about building a number you can trust.

Rising material costs have pushed the median kitchen remodel spend up 9% year over year to $24,000, according to Houzz. That is the median, meaning half of projects cost more. And while 56% of US homeowners plan renovations with a median spend of $24,000, only 34% actually finish on budget, which is exactly why experts recommend building in a 10 to 20% contingency fund from the start.
How to build a detailed project budget
Follow this process to create a budget that holds up:
- Research current material costs for your specific project type. Get current pricing from local suppliers, not national averages, because Phoenix-area costs differ from the national median.
- Itemize every line item separately. Labor, materials, permits, design fees, and disposal should each have their own number.
- Add your contingency fund. For a project in the $30,000 range, that means setting aside $3,000 to $6,000 in reserve before construction begins.
- Include financing costs if you are using a home equity line or renovation loan. Interest adds real money over the life of the project.
- Confirm your contractor's allowances. When bids include "allowances" for tile or fixtures, ask exactly what that covers so you are not hit with upgrade costs later.
West Valley-specific costs to plan for
West Valley homeowners deal with one budget wildcard that surprises many first-time remodelers: caliche. Caliche is a naturally occurring rock-hard calcium carbonate layer found beneath the soil across much of the Phoenix metro area. If your project involves any foundation work, drainage modifications, or below-grade excavation, hitting a caliche layer can add $1,500 to $5,000 or more to your project depending on depth and scope.
Other locally relevant cost surprises include:
- HVAC upgrades triggered by additions: Adding square footage often requires upsizing your cooling system, which is not always included in contractor bids
- Older plumbing materials: Many West Valley homes built before 2005 used polybutylene pipe, which must be replaced if disturbed
- Insulation upgrades: Phoenix's extreme heat means energy code requirements for insulation in remodels are stricter than in most states
Budget reference table
| Project | Baseline estimate | With 15% contingency |
|---|---|---|
| Kitchen remodel (mid-range) | $24,000 | $27,600 |
| Full bathroom remodel | $14,000 | $16,100 |
| Primary suite addition | $65,000 | $74,750 |
| Flooring replacement (1,500 sq ft) | $9,000 | $10,350 |
For a deeper look at how to set realistic financial expectations, read these home remodeling budgeting tips before you finalize any numbers with a contractor.
Pro Tip: Never give a contractor your full contingency budget. Share the base estimate only. If they know you have an extra $5,000 in reserve, that number tends to get spent.
With your budget framework in place, let's review the permitting and legal requirements crucial for West Valley remodels.
Navigating West Valley permitting and inspection processes
Permits are where most remodeling timelines fall apart. Homeowners either skip them (a costly mistake when selling or filing insurance claims), or they start the process too late and end up delaying demolition by weeks. This is an area where early action pays off significantly.
Phoenix residential remodel permits require a plan review that averages 20 to 30 days for minor remodels under 2,000 square feet, with inspections required at framing, rough mechanical, plumbing, and electrical stages, plus insulation and final inspection. That is not a one-day process. It is a multi-week sequence built into the construction schedule.
"Most remodelers underestimate the permitting timeline, treating it as a 2-to-4-week step. The smarter approach is to begin the process 6 to 8 weeks before you plan to start demolition."
Permit timeline and key inspection stages
Here is the typical sequence for a permitted West Valley remodel:
- Submit permit application with architectural plans, site plans, and project description
- Plan review period: 20 to 30 business days for most residential projects
- Permit issuance: Once approved, your contractor can schedule demolition and rough work
- Framing inspection: Called after structural framing is complete but before any drywall goes up
- Rough MEP inspection: Mechanical, electrical, and plumbing inspections occur before walls are closed
- Insulation inspection: Required before drywall in most West Valley jurisdictions
- Final inspection: Confirms all work matches approved plans and meets current code
What you need before submitting
Before your application is accepted, gather the following:
- Architectural floor plans (drawn to scale)
- Site plan showing the property boundary and existing structures
- Contractor license numbers for all trades (electrical, plumbing, HVAC)
- Energy compliance documentation if your project affects the building envelope
For a full walkthrough of local requirements, the Phoenix remodeling permits guide covers the documentation and process in detail.
Now that you understand permits, let's explore managing contractors and construction workflow for smoother execution.
Managing contractors and workflow for a successful remodel
Choosing the right contractor is the single decision with the highest impact on your project's outcome. A skilled, licensed team with good communication habits will navigate problems without drama. An unlicensed or disorganized one will make every problem your problem.
Arizona contractor licensing requires that contractors hold appropriate residential licenses that match the scope and trade classifications of your specific project. Before signing anything, verify that your general contractor holds an active license and that any subcontractors they use (electricians, plumbers, HVAC techs) are independently licensed for their respective trades.
How to vet and hire the right contractor
Follow this step by step approach before committing to any bid:
- Collect at least three bids from licensed contractors. Do not automatically choose the lowest one.
- Verify the ROC license number on Arizona's Registrar of Contractors website. Confirm it is active and has no unresolved complaints.
- Check references from recent projects within the last 12 months. Ask specifically about communication and how the contractor handled unexpected problems.
- Review the contract carefully. It should include a detailed scope of work, payment schedule tied to milestones (not dates), and clear change order procedures.
- Confirm insurance coverage. Your contractor should carry general liability and workers' compensation insurance.
More context on protecting yourself legally and practically is available in this Arizona contractor licensing guide.
Scheduling and sequencing work phases
Construction phases must happen in a specific order. Rushing any step typically means rework, which costs money and time. The standard sequence for most West Valley remodels looks like this:
- Demolition (after permit is issued and utility disconnections are confirmed)
- Structural framing if walls are being moved or added
- Rough-in work: plumbing, electrical, and HVAC run through walls before they close
- Inspections at each rough-in stage before proceeding
- Insulation and drywall
- Cabinet installation and finish carpentry
- Flooring, tile, and paint
- Fixture installations: plumbing fixtures, lighting, appliances
- Final inspection and punch list
Contractor comparison table
| Factor | Licensed general contractor | Unlicensed handyman |
|---|---|---|
| Permit eligibility | Yes | No |
| Liability protection | Yes (with insurance) | No |
| Subcontractor oversight | Yes | No |
| Recourse if work fails | ROC complaint process | Limited or none |
| Best for | Full remodels and additions | Minor cosmetic repairs only |
Pro Tip: Build a weekly check-in into your contract. A 15-minute site walk with your contractor every Friday gives you visibility into progress and surfaces problems before they compound. Contractors who resist this are worth noting before you sign.
Read this general contracting guide to understand how a skilled general contractor manages subcontractors and keeps your project on track.
With contractors engaged, let's cover how to verify quality and handle common remodeling challenges until project completion.
Ensuring quality and handling remodeling challenges
A permit is not a guarantee of quality. Inspections catch code violations, but they do not catch poor craftsmanship, misaligned tiles, or sloppy finishing work. That is your responsibility as the homeowner to monitor at key milestones.
Phoenix rough-in inspections fail on the first attempt about 30% of the time, most commonly due to incorrect GFCI and AFCI electrical placement and failing gas pressure tests. When those failures happen, they push your schedule back by days or weeks while reinspection is scheduled.
Quality verification checklist by phase
Use this checklist as a guide to what you should be looking for at each stage:
Framing stage:
- All new walls are plumb, level, and square
- Headers above doors and windows are correctly sized for the span
- Blocking is installed for future grab bars, towel bars, or heavy wall-mounted fixtures
Rough-in stage:
- Electrical boxes are at the correct heights and properly secured
- GFCI outlets are placed within required distances of water sources
- Plumbing rough-ins are at the correct heights for fixtures and properly supported
- Gas lines are pressure-tested before walls close
Finishing stage:
- Tile work is level and grout lines are consistent
- Cabinet doors are aligned and hardware is uniform
- Paint edges are clean, especially at ceiling and trim transitions
- Flooring transitions between rooms are flush and properly trimmed
How to handle problems before final payment
This is where many homeowners get it wrong. They accept work that is not right because they feel awkward pushing back, and then they pay. Do not do this.
- Document every issue with photos and a written description, including the date you noticed it.
- Submit a written punch list to your contractor before final payment is due.
- Hold final payment until all items are resolved. Your contract should have milestone-based payments, which gives you this leverage.
- If issues are serious, contact the Arizona Registrar of Contractors. They investigate complaints against licensed contractors and have real authority to require corrections.
Pro Tip: Walk the job with your contractor at the end of each major phase, not just at the very end. Catching a framing issue before drywall goes up saves far more time and money than finding it after.
For additional remodeling quality assurance tips relevant to Arizona homes, the linked resource breaks down what experienced project managers look for during site visits.
A West Valley remodeler's perspective: practical truths and lessons learned
After working on residential projects across Buckeye, Goodyear, and the wider Phoenix metro, a few things stand out as truths that most guides skip over.
Contingency is not optional. In the West Valley specifically, it is a structural part of the budget. Material prices here track Phoenix-area supply chain dynamics that shift faster than national averages. Caliche removal, over-excavation costs, and unexpected HVAC capacity upgrades are not rare edge cases. They are common enough that every project should assume at least one surprise.
Honest contractor relationships prevent scope creep more than contracts do. The paperwork matters, but what actually controls costs is a homeowner who communicates clearly about their limits and a contractor who does not oversell. The most successful projects we see are ones where the homeowner walks in with a defined scope, tells the contractor what the firm budget is, and invites honest feedback on what is achievable. That conversation, had early, saves more money than any change order clause.
West Valley's climate affects more than just comfort. Choosing materials that cannot handle sustained summer temperatures above 110°F, intense UV exposure, and dramatic monsoon moisture cycles is a genuine construction risk. Exterior paints, roofing underlayments, grout types, and even cabinet materials behave differently here than they do in milder climates. Your contractor should be advising you on this.
Timelines are routinely underestimated. Most homeowners assume a "small remodel" means two or three weeks of construction. It rarely does, once you factor in the permit planning timeline that starts 6 to 8 weeks before demolition, lead times for cabinetry (often 4 to 8 weeks for custom orders), and inspection scheduling gaps. A realistic minor kitchen remodel, from signed contract to final walkthrough, typically runs 12 to 16 weeks total. Planning with that reality in mind prevents the frustration that sours otherwise successful projects.
For a broader look at how expert remodeling insights translate into West Valley homes specifically, that resource covers additional project types and their local nuances.
Work with Urban Edge LLC for expert West Valley remodeling
Planning a remodel the right way takes time, local knowledge, and a contractor you can trust to handle every moving part without cutting corners. That is exactly what Urban Edge AZ LLC delivers to homeowners across Buckeye, Goodyear, and Phoenix.
Urban Edge general contracting services cover the full project lifecycle, from initial design and permit documentation to licensed subcontractor management and final inspections. Their team understands West Valley building conditions, including caliche excavation, energy code requirements, and the material choices that hold up in extreme Arizona heat. With transparent pricing, milestone-based payment schedules, and warranty-backed workmanship, Urban Edge AZ LLC takes the guesswork out of one of the biggest investments you can make in your home. Book a free consultation to get a real cost estimate for your project and take the first step with a team that knows this region.
Frequently asked questions
What types of remodels commonly require permits in the West Valley area?
Most kitchen, bathroom, and major interior remodels in West Valley require permits because they involve structural, electrical, or plumbing changes that must meet local codes. Phoenix residential permits apply to any project affecting the building's structure, electrical system, plumbing, or HVAC.
How much contingency should I include in my remodeling budget?
Build in 10 to 20% above your base estimate to cover rising material costs and unexpected site conditions during construction. Only 34% of homeowners who plan renovations finish on budget, which is why that buffer is considered essential rather than optional.
How long does the plan review process for remodel permits usually take in Phoenix?
Plan reviews for minor remodeling projects typically take 20 to 30 days, so starting the permitting process 6 to 8 weeks before construction helps avoid schedule gaps.
What can cause inspection failures during a remodel?
Phoenix rough-in inspections fail on the first attempt 30% of the time, most often due to GFCI and AFCI electrical placement errors and gas pressure test failures. Catching these issues before the inspector arrives by having your contractor self-check against code requirements prevents costly scheduling delays.